Forum for kitesurfers
-
Johnny Rotten
- Very Frequent Poster
- Posts: 501
- Joined: Thu Dec 04, 2008 1:50 am
- Style: Surf and wake
- Gear: Vegas
Torch
Neo's
Hand made boards of pure excellence
- Brand Affiliation: None
- Location: No fixed address
-
Has thanked:
10 times
-
Been thanked:
29 times
Postby Johnny Rotten » Sun Dec 15, 2013 2:53 am
NYKiter wrote:Got it - thanks for the photos. Just getting familiar with this setup.

Can you comment on the extra nose line?
The nose line (5th)
Is designed to be THE SAME LENGTH as the other front lines under any depower situation
It should always rest against the stopper. and then above the Y should be the same length as the other flying lines.
When the depower is pulled, It pulls the 5th as well. the 5th goes slack BELOW the Y but retains tension and the same relative length as the other flying lines ABOVE the Y
When you pull your release it travels through the ring and flags the kite,
hope this helps.
-
NYKiter
- Very Frequent Poster
- Posts: 2057
- Joined: Fri Mar 22, 2013 9:17 pm
- Style: Wave
- Gear: .
-
Has thanked:
11 times
-
Been thanked:
26 times
Postby NYKiter » Sun Dec 15, 2013 3:26 am
Johnny Rotten wrote:
The nose line (5th)
Is designed to be THE SAME LENGTH as the other front lines under any depower situation
It should always rest against the stopper. and then above the Y should be the same length as the other flying lines.
When the depower is pulled, It pulls the 5th as well. the 5th goes slack BELOW the Y but retains tension and the same relative length as the other flying lines ABOVE the Y
When you pull your release it travels through the ring and flags the kite,
hope this helps.
I got the 5th line loading thing.
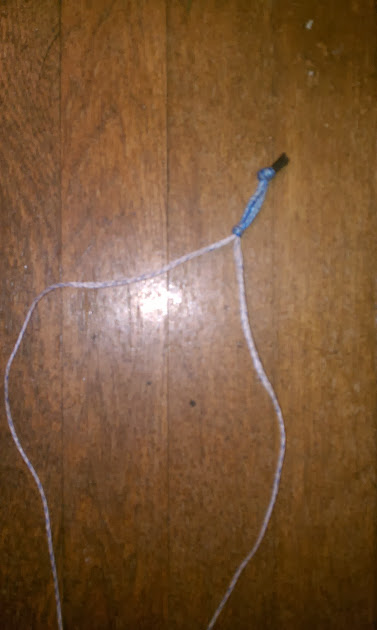
Still confused...one of the north kites came with this single white and blue line (called a nose line) attached to the LE where the front lines should go...the other kite came with the same line but it wasn't attached and it was in the bag (there was a direction set that came with it saying it was optional). Shouldn't the 'front lines' go where this 'nose line' is attached? this is strange. Its a single line that ties into a small blue pig tail...no idea what it attaches too.. a small tab on the line reads 'RB10-06 194cm' Im seeing that it was some sort of invert warranty fix or something....
There have been reports of the kites folding under extreme force though - and North put a press notice out to recommend fitting an extra nose line to the centre of the kit if you are a heavy rider - along with telling riders to make sure that they are pumped up really hard. There are a couple of threads about this elsewhere on the forum.
viewtopic.php?t=2380873&p=800629
Last edited by
NYKiter on Sun Dec 15, 2013 3:53 am, edited 1 time in total.
-
Johnny Rotten
- Very Frequent Poster
- Posts: 501
- Joined: Thu Dec 04, 2008 1:50 am
- Style: Surf and wake
- Gear: Vegas
Torch
Neo's
Hand made boards of pure excellence
- Brand Affiliation: None
- Location: No fixed address
-
Has thanked:
10 times
-
Been thanked:
29 times
Postby Johnny Rotten » Sun Dec 15, 2013 3:52 am
What kite you got?
2010 Rebel 6m?
Evo Fuse, dyno, dice, the kite can be flown in 4 line mode OR 5th line mode
Rebel vegas are 5 line only
on these kites .
Front lines: attach near the end of the leading edges to a longer piece of dyneema (1-2 feet)
rear lines: attach at the trailing edge to a short piece of dyneema (a few inches.)
Nose lines attach in a Y formation on either side of the center strut. to 2 tiny dyneema loops sewn onto the kite. .
-
NYKiter
- Very Frequent Poster
- Posts: 2057
- Joined: Fri Mar 22, 2013 9:17 pm
- Style: Wave
- Gear: .
-
Has thanked:
11 times
-
Been thanked:
26 times
Postby NYKiter » Sun Dec 15, 2013 4:02 am
Johnny Rotten wrote:What kite you got?
2010 Rebel 6m?
Evo Fuse, dyno, dice, the kite can be flown in 4 line mode OR 5th line mode
Rebel vegas are 5 line only
on these kites .
Front lines: attach near the end of the leading edges to a longer piece of dyneema (1-2 feet)
rear lines: attach at the trailing edge to a short piece of dyneema (a few inches.)
Nose lines attach in a Y formation on either side of the center strut. to 2 tiny dyneema loops sewn onto the kite. .
Yea, just got a 6m 2010 rebel and a 2009 12m rebel
Just unrolled it once more..I see the the trailing edge lines you speak of.
Thank you.
So the nose lines attach to the leading edge and then down to the loaded 5th line?
You think I need it for the 12m also?
So used to slingshot 4 line kites...feel like a fricken idiot...

No wonder Im confused...the manual doesnt show the nose line on the 5th line.


-
sarc
- Very Frequent Poster
- Posts: 1629
- Joined: Sun Jun 11, 2006 4:01 am
-
Has thanked:
37 times
-
Been thanked:
135 times
Postby sarc » Sun Dec 15, 2013 5:29 am
NYKiter wrote:Johnny Rotten wrote:
The nose line (5th)
Is designed to be THE SAME LENGTH as the other front lines under any depower situation
It should always rest against the stopper. and then above the Y should be the same length as the other flying lines.
When the depower is pulled, It pulls the 5th as well. the 5th goes slack BELOW the Y but retains tension and the same relative length as the other flying lines ABOVE the Y
When you pull your release it travels through the ring and flags the kite,
hope this helps.
I got the 5th line loading thing.
Still confused...one of the north kites came with this single white and blue line (called a nose line) attached to the LE where the front lines should go...the other kite came with the same line but it wasn't attached and it was in the bag (there was a direction set that came with it saying it was optional). Shouldn't the 'front lines' go where this 'nose line' is attached? this is strange. Its a single line that ties into a small blue pig tail...no idea what it attaches too.. a small tab on the line reads 'RB10-06 194cm' Im seeing that it was some sort of invert warranty fix or something....
There have been reports of the kites folding under extreme force though - and North put a press notice out to recommend fitting an extra nose line to the centre of the kit if you are a heavy rider - along with telling riders to make sure that they are pumped up really hard. There are a couple of threads about this elsewhere on the forum.
viewtopic.php?t=2380873&p=800629
Guys
about North kites folding in flight
This was for 2009 4-strut Rebels. I have the 2009 12M Rebel and I still use it (after having to replace all the bladder nipples of course, but that's a story for another thread)
I have experienced several foldings in flight and I could always trace it back to following:
1. Low bladder pressure caused by slow leaks from nipples
2. Wrong (yes, WRONG = out of spec) pigtail length on some or all of the kite's bridle/pigtail
I'm opening another thread on this
-
NYKiter
- Very Frequent Poster
- Posts: 2057
- Joined: Fri Mar 22, 2013 9:17 pm
- Style: Wave
- Gear: .
-
Has thanked:
11 times
-
Been thanked:
26 times
Postby NYKiter » Sun Dec 15, 2013 5:35 am
sarc wrote:
Guys
about North kites folding in flight
This was for 2009 4-strut Rebels. I have the 2009 12M Rebel and I still use it (after having to replace all the bladder nipples of course, but that's a story for another thread)
I have experienced several foldings in flight and I could always trace it back to following:
1. Low bladder pressure caused by slow leaks from nipples
2. Wrong (yes, WRONG = out of spec) pigtail length on some or all of the kite's bridle/pigtail
I'm opening another thread on this
Did you end up using North or aftermarket valves?
-
sarc
- Very Frequent Poster
- Posts: 1629
- Joined: Sun Jun 11, 2006 4:01 am
-
Has thanked:
37 times
-
Been thanked:
135 times
Postby sarc » Sun Dec 15, 2013 4:33 pm
i got some no-brand stick on, they were terrible and all failed where the plastic nipple joins the adhesive tape within a couple of days. I took them all off, cleaning up the sticky stuff was a b*&ch, then cleaned off the original nipples and glued them on with 3M 5200. Still some leaks, I put a fairly thick layer of 5200 around the outside perimeter of each nipple, let dry and then it held good. I'll never use stick-on replacement again, if they fail they leave behind a sticky mess that makes further repair too hard (or you have to cut out the whole bladder section and replace)
On this note, 100% of my North valves failed on several kites since 2007, I have 2012 5 and 8m Rebel and so far so good... they do look different, hopefully they changed supplier, finger crossed.
-
NYKiter
- Very Frequent Poster
- Posts: 2057
- Joined: Fri Mar 22, 2013 9:17 pm
- Style: Wave
- Gear: .
-
Has thanked:
11 times
-
Been thanked:
26 times
Postby NYKiter » Sun Dec 15, 2013 5:12 pm
Yes, even aquaseal is not 100%. It forms thousands and thousands of tiny micro bubbles.
I ruined 2 bladders trying to re-glue my valves. Then someone told me about this....looks pretty good for valve failures.
http://www.airtimekite.com/index.php/ai ... -2021.html
Im thinking these two old Norths will be needing some of these at some point in the near future for sure....

Last edited by
NYKiter on Sun Dec 15, 2013 5:24 pm, edited 2 times in total.
-
southflorida
- Medium Poster
- Posts: 167
- Joined: Sat Apr 09, 2011 1:15 pm
- Style: flat water, go fast, practice tricks
- Brand Affiliation: None
-
Has thanked:
0
-
Been thanked:
0
Postby southflorida » Sun Dec 15, 2013 5:22 pm
I should have said earlier - my kite is a 2011 Dyno and has one 5th line without the extra small V up by the kite to distribute the 5th line load. The 2011 Dyno design is a non-loaded 5th, and can be flown with a 4 line bar.
A little OT, but....my 2 cents on valves...
I've tried glueing bladder material with 5200 as an experiment to see how well it works, and in my case, it would peel off with relatively little effort. Did you prep the valve/bladder in a special way to maximize adhesion?
I use Aquaseal urethane adhesive for reseating valves, and it does a fantastic job. So good that if you make a mistake, it's almost impossible to peel off for a re-do. Rookie mistake is to not align the valve plug orientation correctly, especially on a big dump valve...did that once, big oops. It'll interfere with the velcro if done wrong. I've reseated all valves on some kites, never a problem again.
-
NYKiter
- Very Frequent Poster
- Posts: 2057
- Joined: Fri Mar 22, 2013 9:17 pm
- Style: Wave
- Gear: .
-
Has thanked:
11 times
-
Been thanked:
26 times
Postby NYKiter » Sun Dec 15, 2013 5:28 pm
I chased valve leaks on a LF havoc for several months using aquaseal.
I got so fed up I just broke down and purchased another bladder.
When you glob aquaseal on the bladder it curls up a little and its just messy as f*ck.
I'm going to have to say that the Type A Tear Aid used in the ustick valves is better than aquaseal.
Cant get Tear Aid in double side anywhere....they dont make it available to the public as far as I know.
If you can avoid folds and bubbles its way better than aquaseal...in my opinion...

Return to “Kitesurfing”
Who is online
Users browsing this forum: Baidu [Spider], Da Yoda, danilosanied, Exage, Faxie, FunOnTheWater, Google [Bot], Greenturtle, hookedcook, i_love_storm, Kitechook, thewindego, Vivo3d and 641 guests
